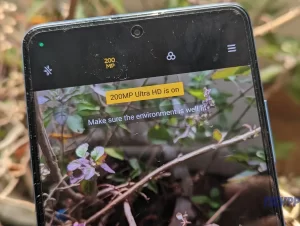
The Redmi Note 12 Pro+ is a flagship smartphone from Xiaomi’s sub-brand Redmi, offering impressive features at an affordable price. One of its standout features is the 200MP camera, which allows users to capture stunning high-resolution photos. In this blog post, we will guide you through the process of enabling the 200MP mode on your Redmi Note 12 Pro+.

Step 1: Open the Camera App
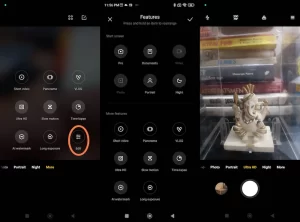
Launch the camera app on your Redmi Note 12 Pro+ by tapping on the camera icon on your home screen or in the app drawer.
Step 2: Access the Camera Settings
Once the camera app is open, look for the settings icon, usually represented by a gear or three dots. Tap on it to access the camera settings.

Step 3: Enable Ultra HD Mode
In the camera settings, scroll down until you find the “Ultra HD” or “200MP” mode option. Tap on it to enable the 200MP mode.
Step 4: Capture Photos in 200MP
After enabling the 200MP mode, you can now start capturing photos with the highest resolution available on your Redmi Note 12 Pro+. Simply frame your shot and press the shutter button to take a photo.

Step 5: Post-processing and Storage Considerations
Keep in mind that 200MP photos will have a significantly larger file size compared to regular photos. Ensure that you have enough storage space on your device or an external storage option to accommodate these high-resolution images. Additionally, post-processing and editing 200MP photos may require more powerful hardware or specialized software.
Conclusion:
Enabling the 200MP mode on your Redmi Note 12 Pro+ allows you to capture incredibly detailed and high-resolution photos. Follow the step-by-step guide outlined above to make the most of this impressive camera feature.


